Arbitrum is a Layer-2 scaling solution for the Ethereum network that offers faster, cheaper, and more private transactions compared to the base Ethereum layer.
By integrating Arbitrum into your MetaMask wallet, you’ll be able to experience the benefits of this innovative technology and take your Ethereum transactions to the next level.
With the added scalability and performance of Arbitrum, you’ll be able to transact with ease and confidence, knowing that your transactions are secure and efficient.
So why wait? Start exploring the benefits of Arbitrum and MetaMask today and take control of your crypto experience!
Adding Arbitrum to Metamask: Step-by-Step Guide
To connect Arbitrum to MetaMask, go to MetaMask, click on the three dots in the top right corner, select ‘Connect to a network’ and then ‘Custom RPC’, enter the Arbitrum network URL, give the network a unique name, such as ‘Arbitrum Mainnet’, and click ‘Save’.
Step 1: Install Metamask Browser Extension
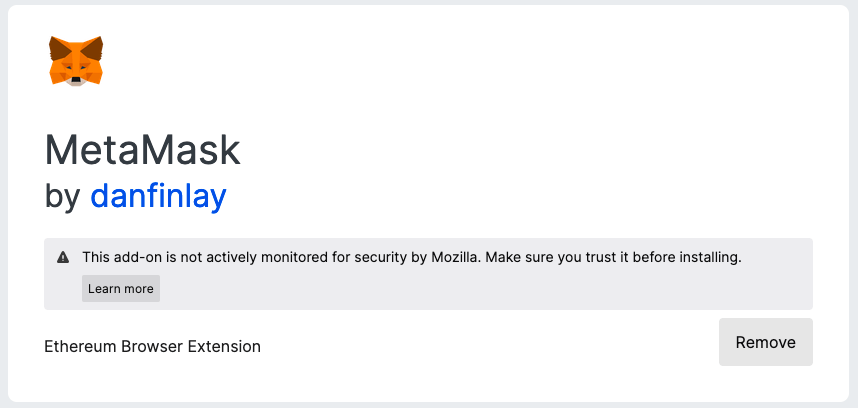
The first step to integrating Arbitrum into your MetaMask wallet is to install MetaMask if you haven’t already. MetaMask is a popular browser extension that allows you to store, manage, and interact with Ethereum-based assets, such as Ether (ETH) and other ERC-20 tokens. Here’s how you can install MetaMask in your browser:
- Visit the Chrome Web Store or Firefox Add-ons Store, depending on the browser you’re using.
- Search for “MetaMask” in the store and click on the “Add to Chrome” (for Chrome) or “Add to Firefox” (for Firefox) button.
- Once the installation is complete, you’ll see a new MetaMask icon in your browser’s toolbar. Click on the icon to open MetaMask.
- On the first launch, you’ll be asked to create a new wallet or import an existing one. Choose “Create a New Wallet” if you don’t have an existing MetaMask wallet.
- You’ll be prompted to set a password for your MetaMask wallet. Make sure to choose a strong and secure password.
- Next, you’ll be shown your seed phrase, which is a 12-word phrase used to recover your MetaMask wallet in case you lose access to it. Write down your seed phrase and store it in a secure location.
- Finally, confirm your seed phrase by entering the words in the correct order.
Congratulations! You have successfully installed MetaMask and created a new wallet. In the next step, we’ll connect MetaMask to the Arbitrum network.
Step 2: Add Arbitrum to Metamask
Now that you have MetaMask installed and connected to the main Ethereum network, the next step is to add Arbitrum to MetaMask. This will allow you to interact with Arbitrum-based assets and participate in Arbitrum-based decentralized applications (dapps). Here’s how you can add Arbitrum to MetaMask:
- Click on the MetaMask icon in your browser’s toolbar to open MetaMask.
- On the MetaMask home screen, click on the “Networks” button in the top-right corner.
- In the “Networks” tab, click on the “Add Network” button in the top-right corner.
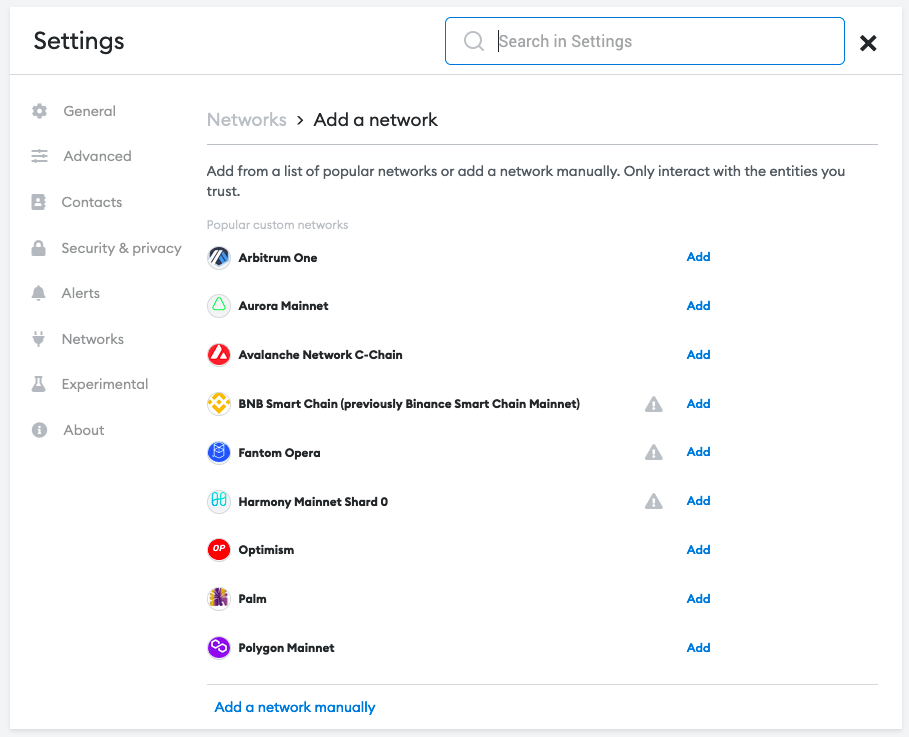
Choose Arbitrum One, and click “Add”. Once you click on “Add”, You will see a pop-up to verify the information.
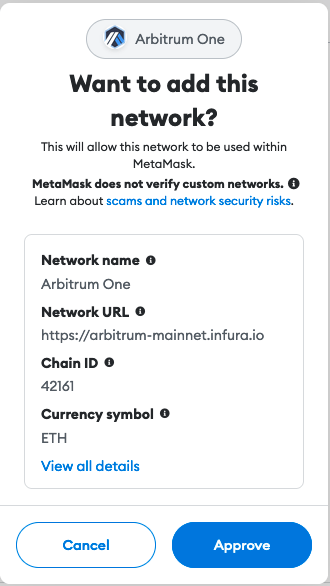
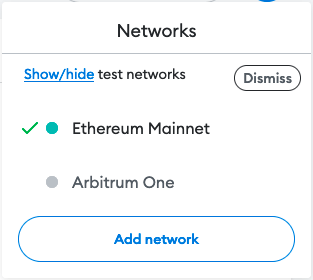
Click On approve Once you Verify the network Details. After You Approved, you will see two Networks in your wallet, Ethereum Maineet and Arbitrum One.
Note: If you are unable to Verify the Given Network, You can also add the network Manually.
To Add a Network Manually, Go to Networks > Add a network > Add a network manually

Here is the Information, You need to Fill in the given Form-
- Network Name: Arbitrum One
- New RPC URL: https://arb1.arbitrum.io/rpc
- Chain ID: 42161
- Currency Symbol: ETH
- Block Explorer URL: https://arbiscan.io
Click on the “Save” button to add Arbitrum to MetaMask.
Once you’ve added Arbitrum to MetaMask, it will appear in the “Networks” tab. You can switch to Arbitrum by clicking on the network dropdown in the top-left corner of MetaMask and selecting “Arbitrum.”
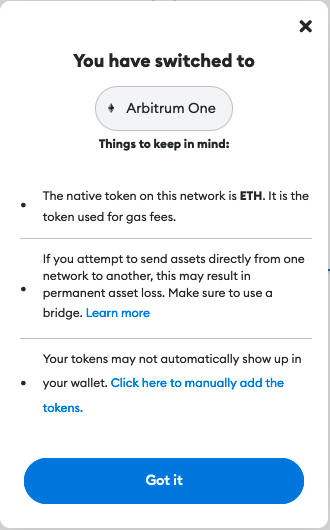
Step 3: Start Using Arbitrum in MetaMask
You’re now ready to start using Arbitrum in your MetaMask wallet! To use Arbitrum, simply select “ETH” from your list of assets in MetaMask and you’re good to go. With Arbitrum One, you’ll be able to experience faster, cheaper, and more private transactions compared to the base Ethereum layer.
Importing Arbitrum One Ecosystem Tokens to Metamask
Adding Arbitrum Tokens to MetaMask is a simple process that can be done in a few steps. Here’s how you can add Arbitrum tokens to MetaMask:
- Open MetaMask: Click on the MetaMask icon in your browser’s toolbar to open MetaMask.
- Check Network: Make sure that MetaMask is connected to the Arbitrum network by checking the network dropdown in the top-left corner. If it’s not connected, switch to the Arbitrum network using the network dropdown.
- Click on “Add Token”: On the MetaMask home screen, click on the “Add Token” button.
- Enter Token Information: In the “Add Token” dialog, enter the following information:
Token Contract Address: Go to Arbiscan and search for your Token (This is the address of the Arbitrum token contract on the Ethereum blockchain.)
For this example, I will be using SushiSwap Cryptocurrency Arbitrum One Contract Address.
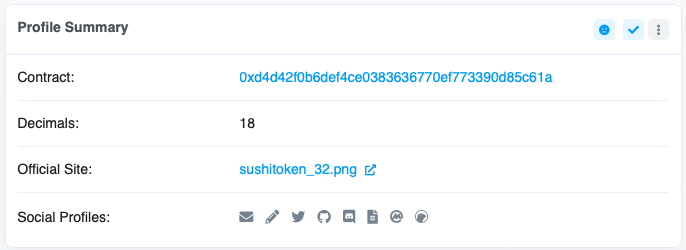
Token Symbol: SUSHI
Decimals of Precision: 18
Add the Token: Click on the “Import Tokens” button to add the Arbitrum token to your MetaMask wallet.
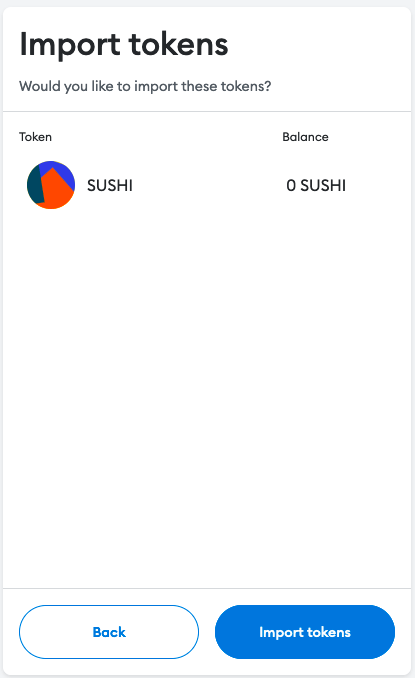
Verify the Token: Once the token has been added, you should be able to see the Arbitrum token balance in your MetaMask wallet. You can verify this by checking the “Assets” section in MetaMask.
That’s it! You have successfully added the Arbitrum token to your MetaMask wallet. You can now use MetaMask to receive, store, and send Arbitrum tokens just like any other ERC-20 token on the Ethereum blockchain.
Conclusion
By integrating Arbitrum into your MetaMask wallet, you can take advantage of the layer-2 scalability solution that is designed to handle the increasing demand for Ethereum transactions.
The ability to easily switch between different networks and access the full range of Ethereum and Arbitrum dapps makes MetaMask an excellent choice for anyone looking to manage their crypto assets.
