Ledger Nano X is a hardware wallet that lets you keep your crypto and NFTs safe and accessible. It works with over 5000 different coins and tokens, including Bitcoin, Ethereum, XRP, Cardano, and Polygon.
In this guide, you will learn how to set up Ledger Nano X device and use it with the Ledger Live app.
Read: Best crypto hardware wallets of 2025
Ledger Nano X Overview
The Ledger Nano X is a device that lets you store and manage your crypto assets and NFTs safely and conveniently. Some of its benefits are:
- Wireless connection: You can use it with your phone or tablet wirelessly to access your crypto anywhere.
- Huge storage: You can keep up to 100 different types of crypto on each device.
- Wide-supported coins: It works with over 5000 different coins and tokens, such as Bitcoin, Ethereum, XRP, Cardano, and Polygon.
- Security and control: You can protect your crypto and NFTs with confidence and have full control over them at all times.
- High protection: It has several security features, such as a secure element chip and a PIN code.
- Simple setup: You can get started with the Ledger Live app in a few minutes.
The Ledger Nano X costs €149.00 and comes with free delivery to almost every country. You should always get it from the official website or from their approved sellers to avoid fraud or damaged devices. You should never get it from eBay, Amazon, or other third-party platforms.
Before you begin Ledger Nano X Set up, make sure you have these items ready:
What You Need to Get Started
- A Ledger Nano X device
- A USB-C cable
- A smartphone or tablet that works with iOS 9+ or Android 7+
- The Ledger Live app installed on your device
- A pen and paper to write down your recovery phrase
Step 1: Turn On Your Ledger Nano X
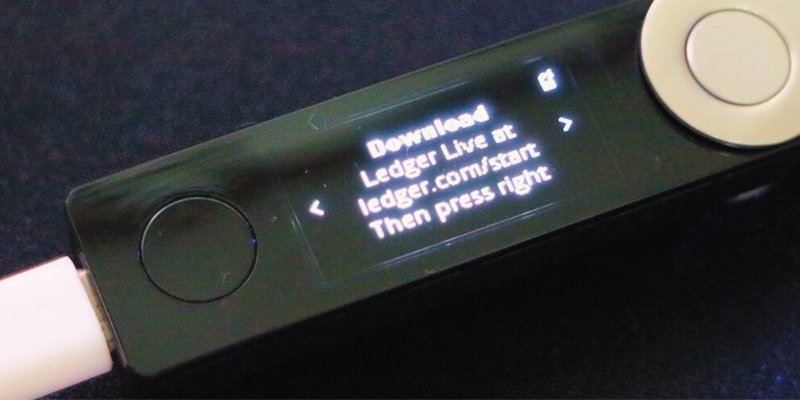
To turn on your Ledger Nano X, press and hold the button next to the USB port for a few seconds. The device will show a welcome message and ask you to download the Ledger Live app.
Step 2: Pair Your Ledger Nano X with Ledger Live
To pair your Ledger Nano X with Ledger Live, follow these steps:
- Open the Ledger Live app on your smartphone or tablet and tap on “Get started”.
- Choose “Initialize as new device” and select “Ledger Nano X”.
- Tap on “Continue” and follow the instructions on the screen to enable Bluetooth on your device and your Ledger Nano X.
- When prompted, scan the QR code shown on your Ledger Nano X with your device’s camera.
- Confirm the pairing code on both devices and tap on “Pair”.
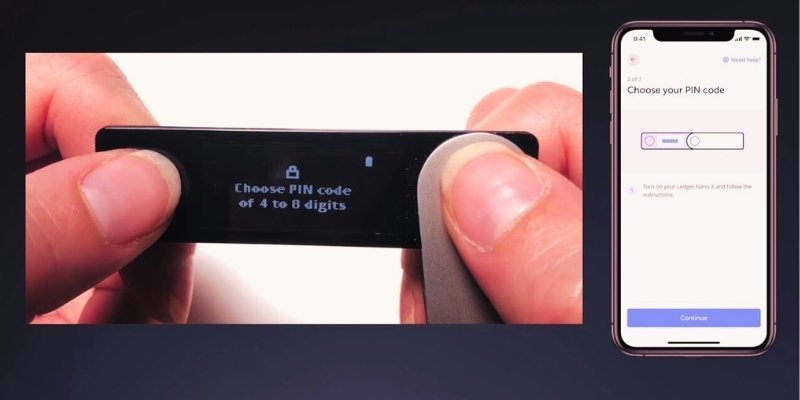
- Choose a PIN code for your Ledger Nano X and confirm it by entering it twice. The PIN code must be between 4 and 8 digits long and cannot have repeating or consecutive numbers.
- Write down the 24-word recovery phrase displayed on your Ledger Nano X on a piece of paper. This phrase is very important as it allows you to restore your device and access your funds in case of loss, theft, or damage. Do not store it digitally or share it with anyone.
- Confirm your recovery phrase by selecting each word in the correct order on your Ledger Nano X.
- Tap on “Continue” and follow the instructions on the screen to finish the setup.
Explore More: Ledger vs Trezor
Step 3: Install Apps on Your Ledger Nano X
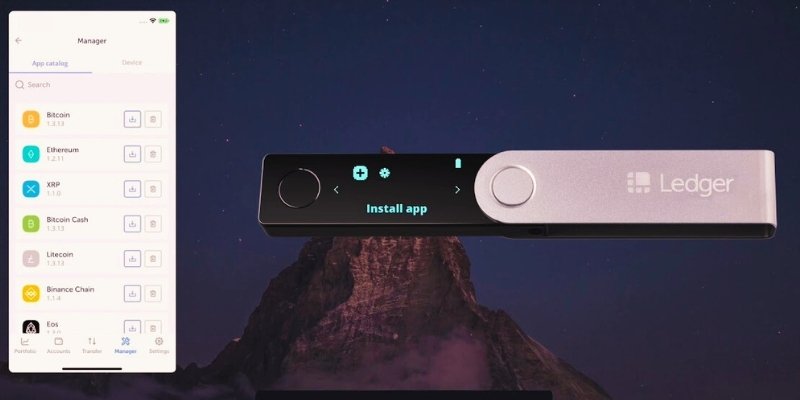
To install apps on your Ledger Nano X, follow these steps:
- Open the Ledger Live app on your smartphone or tablet and tap on “Manager”.
- Connect your Ledger Nano X to your device via Bluetooth or USB-C cable and enter your PIN code.
- Allow Ledger Manager access by pressing both buttons on your Ledger Nano X when prompted.
- Browse through the list of available apps and tap on the ones you want to install. You can install up to 100 apps at the same time on your Ledger Nano X.
- Wait for the installation to complete and tap on “Done”.
Step 4: Add Accounts to Your Ledger Live
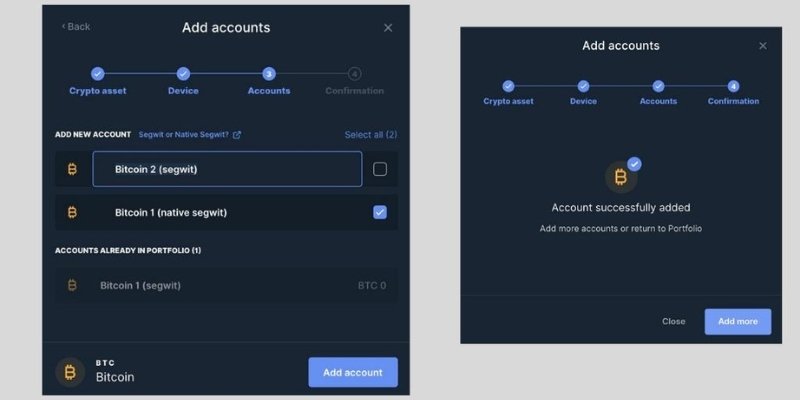
To add accounts to your Ledger Live, follow these steps:
- Open the Ledger Live app on your smartphone or tablet and tap on “Accounts”.
- Tap on the “+” icon at the top right corner and select “Add account”.
- Choose the crypto asset you want to add and tap on “Continue”.
- Connect your Ledger Nano X to your device via Bluetooth or USB-C cable and enter your PIN code.
- Open the corresponding app on your Ledger Nano X by pressing both buttons when you see its name.
- Wait for the synchronization to complete and tap on “Continue”.
- Name your account and tap on “Add account”.
- Repeat these steps for each crypto asset you want to add.
Step 5: Send and Receive Crypto with Your Ledger Nano X
To send and receive crypto with your Ledger Nano X, follow these steps:
To send crypto:
- Open the Ledger Live app on your smartphone or tablet and tap on “Accounts”.
- Select the account you want to send crypto from and tap on “Send”.
- Enter the recipient’s address or scan their QR code. You can also tap on “Contacts” to select an address from your saved contacts.
- Enter the amount you want to send and choose a network fee. You can also tap on “Advanced options” to adjust more settings such as custom fees, UTXO selection, or RBF (replace-by-fee).
- Tap on “Continue” and review the transaction details.
- Connect your Ledger Nano X to your device via Bluetooth or USB-C cable and enter your PIN code.
- Verify the transaction details on your Ledger Nano X and confirm by pressing both buttons.
- Wait for the confirmation message and tap on “Done”.
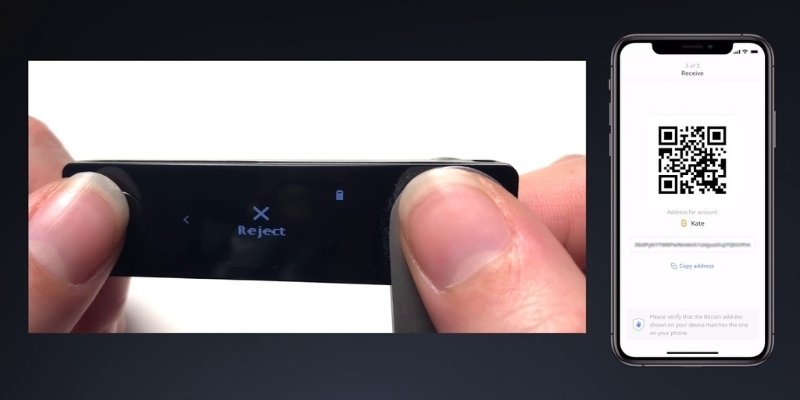
To receive crypto:
- Open the Ledger Live app on your smartphone or tablet and tap on “Accounts”.
- Select the account you want to receive crypto to and tap on “Receive”.
- Connect your Ledger Nano X to your device via Bluetooth or USB-C cable and enter your PIN code.
- Open the corresponding app on your Ledger Nano X by pressing both buttons when you see its name.
- Verify your address on your Ledger Nano X and confirm by pressing both buttons.
- Copy or share your address or scan the QR code. You can also tap on “Contacts” to save your address to your contacts.
- Tap on “Done” and wait for the incoming transaction.
Read more: Best cold storage wallets
How to Set Up Ledger Nano X: Video Guide
You have successfully set up your Ledger Nano X and learned how to use it with the Ledger Live mobile app.
You can now securely store and manage your crypto assets and NFTs with your cold wallet. For a video tutorial, see below.
Related: