If you’re holding cryptocurrencies, you know that security is a top priority. While software wallets are convenient, they’re often connected to the internet, making them more vulnerable to hackers and malware. That’s where crypto hardware wallets come in. In this guide, we’re going to cover:
- What crypto hardware wallets are
- How they actually work
- Different types of hardware wallets are available
- The risks and benefits of using them
- A step-by-step guide on how to use a crypto hardware wallet
- A direct comparison between hardware and software wallets
What are Crypto Hardware Wallets?

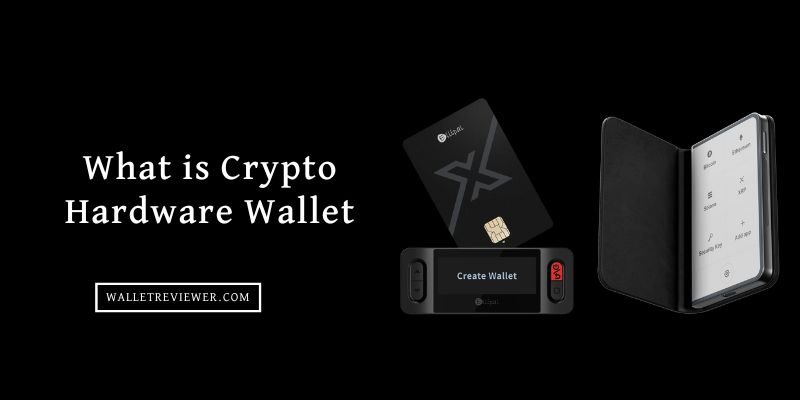
So, what exactly are crypto hardware wallets? Think of them as super secure, tiny physical devices, often looking like a USB stick. Their main job is to keep your “private keys,” which are basically the secret passwords that give you access to your cryptocurrency, completely offline.
You see, your crypto isn’t actually “on” the device itself. Instead, your cryptocurrency technically lives on the blockchain, which is like a huge, public digital ledger. Your hardware wallet just holds the keys to access and manage your assets on that ledger.
The cool thing is, because these devices are offline (“cold storage,” as we call it in the crypto world), they’re way less vulnerable to online threats like hackers, viruses, or malware that could mess with your computer or phone. When you want to send or spend crypto, you connect the hardware wallet, it signs the transaction internally using your private key (which never leaves the device!), and then that signed transaction is sent to the blockchain. This whole process keeps your secret keys safe and sound. It’s like having a secure little vault for your digital money!
Related: Best crypto hardware wallets
How do Hardware Wallets work?
At its core, a hardware wallet is a tiny, purpose-built computer designed with one critical mission: to keep your private keys isolated and secure. Remember, your crypto isn’t on the device; it’s on the blockchain, and your hardware wallet simply holds the cryptographic keys that prove you own it.
1. Key Generation and Secure Storage
- Initial Setup: When you first set up a new hardware wallet, it goes through a crucial process of generating a unique set of cryptographic keys: a public key and a private key. This isn’t done on your computer; it happens inside the secure environment of the hardware wallet itself.
- True Randomness: To ensure maximum security, the device uses a specialized chip (often called a “Secure Element” or a similar tamper-resistant microcontroller) and a true random number generator to create these keys. This means the keys are generated offline and are incredibly difficult to guess or reverse-engineer.
- Offline Isolation: The generated private key is then stored securely within this isolated chip. It never leaves the device in plain text. This is the fundamental security principle: even if your computer is riddled with malware, the private key remains safe inside the hardware wallet.
- Seed Phrase (Recovery Phrase): During setup, the wallet will also generate a “seed phrase” (usually 12 or 24 words). This is your master backup. It’s a human-readable representation of your private key, designed to let you recover your funds on a new device if your original hardware wallet is lost, stolen, or damaged. You’re instructed to write this down physically and keep it extremely safe, never digitally
2. Connecting and Interacting
- Interface Software: To interact with your crypto, you’ll connect your hardware wallet to a computer or smartphone (usually via USB or Bluetooth) and use its dedicated companion software (like Ledger Live for Ledger devices or Trezor Suite for Trezor). This software acts as an interface to display your balances, transaction history, and to prepare new transactions.
- Public Key Sharing: Your hardware wallet provides your public key (or derived public addresses) to this software. This public key is what you share with others if you want to receive crypto. It’s like your bank account number, public and safe to share.
3. The Transaction Signing Process
This is where the offline security really shines:
- Transaction Creation (External): When you want to send crypto, you’ll use the companion software on your computer/phone. You input the recipient’s address, the amount, and any network fees. This information forms an “unsigned transaction.”
- Data Transfer (to Wallet): The unsigned transaction data is then sent from your computer/phone to your hardware wallet. Critically, your private key does not leave the hardware wallet.
- On-Device Verification: The hardware wallet displays the full details of the transaction on its small screen. This is a crucial step! You, the user, must physically verify that the recipient address and amount shown on the hardware wallet’s screen match what you intended. This prevents “blind signing,” where malware on your computer could trick you into approving a malicious transaction without you knowing.
- PIN/Passphrase Confirmation: You’ll typically be prompted to enter a PIN on the device itself (or a shuffled keypad displayed on your computer, with you entering the numbers on the wallet). Some also require a physical button press. This acts as a second factor of authentication, ensuring only you can authorize the transaction.
- Offline Signing (Internal): Once you confirm, the hardware wallet uses your private key (which, again, never leaves the secure chip) to cryptographically “sign” the transaction data. This digital signature proves that you, the owner of the private key, authorized the transaction.
- Signed Transaction Transfer (Back to Computer): The signed transaction (not your private key!) is then sent back from the hardware wallet to your computer/phone.
- Broadcasting to Blockchain: Finally, your computer/phone’s companion software broadcasts this signed transaction to the cryptocurrency network (the blockchain). The network then verifies the signature against your public key to ensure it’s legitimate, and if all checks out, the transaction is added to the blockchain.
Related: Best cold storage wallets
Types of Hardware Crypto Wallets

When we talk about hardware crypto wallets, there isn’t just one single design. Manufacturers have come up with different approaches to achieve that core goal of keeping your private keys safe offline. Let’s look at a few common types:
1. USB-connected wallets
These are probably the most common type you’ll see, looking a lot like a standard USB stick. You plug them directly into your computer, and the device’s companion software helps you manage your crypto. The key security feature here is that your private keys stay locked inside the wallet’s secure chip, even while it’s connected.
It simply signs transactions internally and sends the signed data back to your computer for broadcasting to the blockchain. They offer a good balance of security and ease of use for most people.
Example: BitBox02 and Ledger Nano X
2. Bluetooth-enabled wallets
These are similar to USB wallets in function but offer the convenience of wireless connectivity, typically to a smartphone or tablet. Instead of a cable, they use Bluetooth to communicate with your device’s app.
While this adds convenience for mobile users, it does introduce a wireless connection, which some might see as a slight increase in potential attack surface compared to a purely wired connection. However, the private keys still remain securely isolated within the device’s hardware, with transactions signed offline.
Example: Ledger Stax, Ledger Nano X, and SafePal X1
3. Air-gapped wallets
These are designed for the absolute highest level of security, as they never connect directly to any internet-connected device, not even via USB or Bluetooth. To make a transaction, you might use QR codes or an SD card to transfer unsigned transaction data to the wallet.
The wallet then signs it offline and sends the signed transaction back via another QR code or SD card to an internet-connected device for broadcasting. This physical separation, or “air gap,” makes them incredibly resistant to online hacks, although they can be a bit less convenient for frequent use.
Example: ELLIPAL Titan, Keystone 3 Pro, and NGRAVE ZERO
Risks of Using Hardware Wallets
- Loss or Theft of the Device: If you lose your hardware wallet or it gets stolen, you could lose access to your funds if you haven’t properly backed up your recovery phrase. Anyone finding it can’t access your crypto without your PIN, but the device itself is gone.
- Forgetting or Losing Your PIN: Every hardware wallet is protected by a Personal Identification Number (PIN). If you forget this PIN or lose it, you won’t be able to unlock your device and access your crypto assets.
- Losing Your Recovery Seed Phrase: The recovery seed phrase is the ultimate backup for your wallet. If you lose this phrase and your hardware wallet is damaged or inaccessible, your funds will be permanently lost, as there’s no other way to restore access.
- Supply Chain Attacks: There’s a small risk that a malicious actor could tamper with a hardware wallet during manufacturing or shipping. This could potentially compromise the device before it even reaches you, though reputable brands have strong security measures against this.
- Human Error: Even with top-notch security, human error remains a risk. This could include sending funds to the wrong address, approving a transaction you didn’t fully understand, or falling for a phishing scam that tricks you into revealing your seed phrase.
Benefits of Using Hardware Wallets
- Offline Security (Cold Storage): The biggest benefit is that your private keys are stored offline, away from internet-connected devices. This makes them highly resistant to online hacking attempts, malware, and viruses.
- Immunity to Computer Viruses: Since the private keys never leave the secure element of the hardware wallet, they are safe even if the computer you connect it to is infected. Transactions are signed internally, not by your potentially compromised computer.
- Protection Against Phishing: Most hardware wallets have a screen that displays transaction details, which you must physically verify. This helps prevent phishing attacks where a scammer tries to trick you into signing a different transaction than you intended.
- Portability and Convenience: They are small, easy to carry, and allow you to access your crypto on the go without needing to rely on a specific computer. You can use them with various computers or mobile devices securely.
- Self-Custody and Full Control: Using a hardware wallet means you have full control over your private keys and, therefore, your funds. You aren’t relying on a third-party exchange or service to hold your assets, reducing counterparty risk.
How to Use a Crypto Hardware Wallet?

Step 1. Initial Setup & PIN Creation
First, unbox your wallet and plug it in. The device will prompt you to set up a PIN (Personal Identification Number). This PIN will be required every time you access your wallet, so choose a strong, memorable one and keep it secret.
Step 2. Generate & Back Up Your Recovery Seed Phrase
This is crucial. Your wallet will display a recovery seed phrase (a series of 12, 18, or 24 words). Write these words down exactly as they appear, in order, on a physical piece of paper. This phrase is your only way to restore your funds if your wallet is lost or damaged. Store it securely and offline, away from your wallet.
Step 3. Install Companion Software
You’ll need an application on your computer or phone to interact with your wallet. Download the official companion software (like Ledger Live or Trezor Suite) directly from the manufacturer’s official website. Launch the app and connect your hardware wallet.
Step 4. Sending and Receiving Crypto
To receive crypto, open the “Receive” section in the software. Your wallet will display an address; always verify this address on your wallet’s screen before sharing it. To send crypto, enter the recipient’s address and amount in the software. The transaction details will then appear on your wallet’s screen. You must physically confirm these details on the wallet’s screen and enter your PIN to authorize the transaction.
Step 5. Managing Different Cryptocurrencies
To hold various cryptocurrencies, you might need to install specific “apps” for those coins onto your hardware wallet via the companion software. These apps enable the wallet to interact with different blockchains without affecting your private keys.
Step 6. Keep Firmware & Software Updated
Regularly update your hardware wallet’s firmware and its companion software. These updates provide important security enhancements and new features. Always perform updates through the official software, following the manufacturer’s instructions.
Related: Best crypto wallets
Hardware Wallet vs Software Wallet: Which is Better?
| Feature | Hardware Wallet | Software Wallet |
| Key Storage | Offline on secure physical chip | Online on device (computer, phone, browser) |
| Internet Access | Never connects to internet; private keys always offline | Always connected to internet (or device is connected) |
| Security Level | Very high; resistant to malware, phishing, online hacks | Moderate; vulnerable to malware, phishing, device hacks |
| Cost | Requires purchase (e.g., $50 – $200+) | Generally free |
| Convenience | Less convenient; physical device needed for transactions | Highly convenient; quick access anywhere online |
| Best Use Case | Long-term storage, large crypto amounts | Frequent transactions, small amounts, DApp interaction |
| Backup/Recovery | Recovery seed phrase (physical backup) | Recovery seed phrase (often digital backup risk) |
| Physical Risk | Loss, theft, damage to device | Device loss/theft, but also cyber threats |
| Transaction Signing | On-device physical confirmation required | Software confirmation on device |